Triumph Farms
Training

Complete Catfish Farming
Training Manual 2025

A practical 10-step guide: from 5 g fingerlings to market size. Designed for Ghanaian farmers who want predictable survival and steady profit.

10-Step Catfish Farming Training — Quick Overview

This practical manual presents concise, actionable steps for fingerling care, pond preparation, feeding, water management, grading, disease prevention and harvesting. Each step contains daily & weekly tasks and practical tips you can apply on day one.

1

Understanding Your Fingerlings

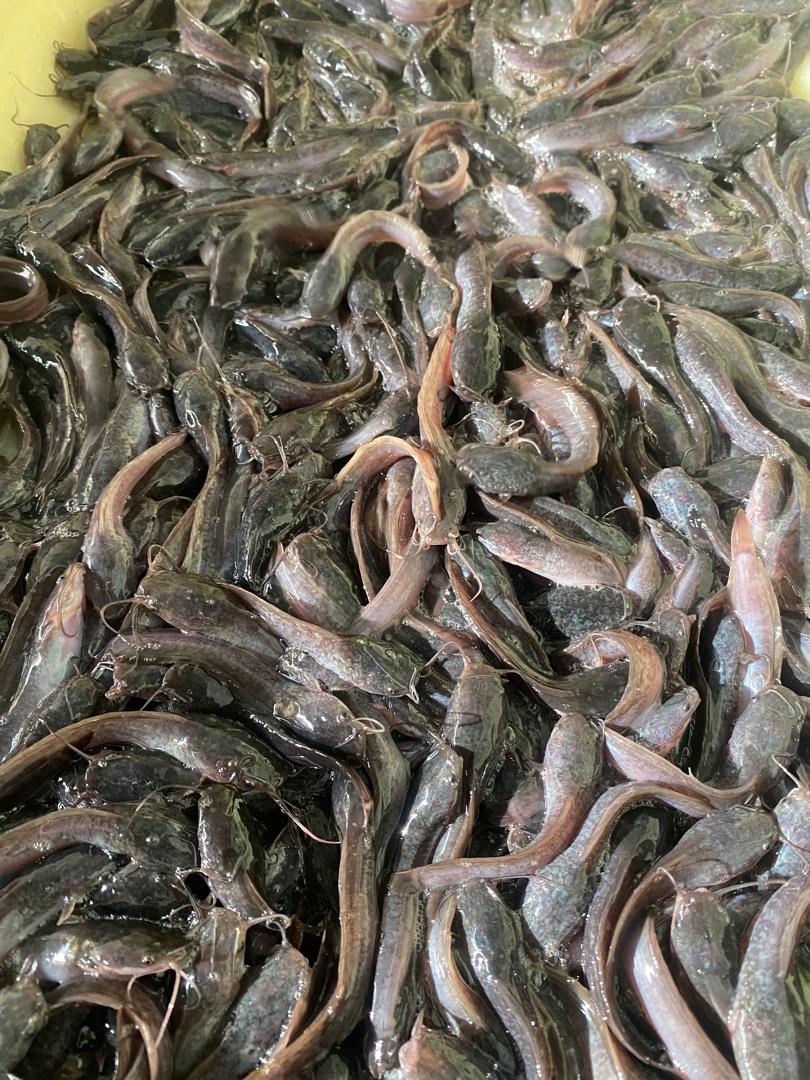
Fingerlings are the youngest and most sensitive stage of your fish. This stage determines how strong and uniform your stock will grow. With the right care in the first few days, your survival rate can be extremely high.

95%+

Achievable survival rate with proper early-stage handling

  • Very delicate — handle them gently
  • Highly sensitive to water changes
  • Reduce stress — avoid unnecessary transfers
  • Monitor daily for activity and feeding response

Do This First

Hold new fingerlings in a small quarantine tank for 5–7 days. Watch their movement, feeding pattern, and overall behavior before moving them to the main pond.

2

Pond / Tank Preparation (7–14 Days Before Stocking)

The condition of your pond or tank determines how well your fingerlings will settle when they arrive. Proper preparation eliminates harmful organisms, stabilizes your water, removes toxic build‑ups, and creates an environment where young fish can grow with minimal stress. Most farms that experience high mortality usually skip key steps during preparation.

A well‑prepared pond reduces disease outbreaks by 70%–90% and helps your fingerlings adapt faster.

Clean & Disinfect

  • • Drain pond completely
  • • Remove sludge, mud, waste & old feed
  • • Scrub walls and floor if possible
  • • Disinfect with lime or salt depending on pond type
  • • Rinse well to avoid chemical residues

Sun‑Dry (Earthen Ponds)

Allow 5–7 days of drying. Sunlight naturally kills parasites, fungus, bacteria, and harmful microbes. Drying also breaks down ammonia deposits.

Fill the Pond

Fill the pond 2–3 days before stocking. This helps chlorine evaporate from tap water and gives the water time to stabilize.

Aeration

Install aerators before stocking. Ensure dissolved oxygen stays above 5 mg/L. Low oxygen is one of the fastest killers of fingerlings.

Extra Things to Check Before Stocking

  • • Ensure no leaks or weak points in the pond walls
  • • Confirm that predators (birds, frogs, snakes) cannot enter
  • • Install nets or simple pond covers for added safety
  • • Run aerators for at least 24 hours before fish arrive
  • • Test temperature and pH in the morning and evening
3

Ideal Stocking Practices

Proper stocking ensures your fingerlings have enough space to grow, minimizes stress, and prevents disease outbreaks. Overcrowding is one of the main reasons for slow growth or high mortality.

Pond / Tank Type Suggested Fingerling Density
Concrete tank (10 × 10 ft)800–1,200 fingerlings
Earthen pond (300 m²)3,000–5,000 fingerlings
Tarpaulin tank (10,000 L)1,000–2,000 fingerlings

Acclimatization Tips (Never Skip)

  • Float transport bags on the pond surface for 10–15 minutes to match water temperatures.
  • Add small amounts of pond water to the bag every 5 minutes for 15–30 minutes to help fish adjust gradually.
  • Gently release fingerlings using a net; avoid pouring them directly to prevent stress and injuries.
  • Observe closely for the first hour — look for erratic swimming or lethargy.

Tip: Always stock during cooler parts of the day, such as early morning or late afternoon, to reduce temperature shock.

4

Feeding: Fingerlings → Grow-Out

Feeding determines growth speed, body uniformity, survival rate, and overall profitability. Each growth stage requires a specific pellet size, protein level, and feeding frequency. Matching these correctly prevents wastage, boosts feed conversion ratio (FCR), and keeps fish healthy and active.

Fingerlings (4–8 g)

1.5–2 mm pellets • 3–4× daily • 45–50% protein

  • • Feed lightly but frequently
  • • Avoid overfeeding to prevent ammonia buildup
  • • Observe feeding response daily
  • • Remove uneaten feed within 10–15 minutes

Juveniles (10–50 g)

2–4 mm pellets • 2–3× daily • 40–45% protein

  • • Transition steadily to larger pellets
  • • Introduce floating pellets for better monitoring
  • • Maintain consistent feeding times
  • • Reduce feeding slightly during cold mornings

Grow-Out (100 g → 2 kg)

4–6 mm pellets • 2× daily • 32–38% protein

  • • Feed early morning and late afternoon
  • • Monitor growth every 2–4 weeks
  • • Adjust feed quantity according to biomass
  • • Avoid feeding during low-oxygen periods

Pro Feeding Tips for Maximum Growth

  • • Always feed according to biomass — not guesswork.
  • • Use high-quality feed; poor feed leads to slow growth and high FCR.
  • • Keep a strict feeding timetable; fish perform best with routine.
  • • Increase feed gradually as fish size increases.
  • • Stop feeding when fish are stressed or during heavy rainfall.
5

Water Management (MOST IMPORTANT)

Stable and clean water is the backbone of healthy fish farming. Even if everything else is perfect, poor water quality can quickly lead to stress, disease, and mortality. Monitoring your pond daily is non-negotiable.

Daily Tasks

  • Change 10–20% of pond water, if feasible, to maintain cleanliness.
  • Remove visible waste, debris, and uneaten feed to prevent ammonia build-up.
  • Monitor water parameters: Dissolved Oxygen (DO > 5 mg/L), Temperature (26–30°C), pH (6.5–7.5).
  • Observe fish behavior for early stress signs (e.g., erratic swimming or lethargy).

Weekly Tasks

  • Change 40–60% of water if accumulation of waste is high.
  • Scrub pond walls and siphon bottom sludge to prevent bacterial growth.
  • Check and clean aerators, pumps, or filters for consistent oxygenation.

Warning: Bad Water Signs

  • Fish gasping or clustering at the water surface.
  • Refusal to eat or decreased feeding activity.
  • Water changes color, smells foul, or becomes cloudy.
  • Sudden deaths without apparent cause.
  • Algae blooms or excessive plant growth affecting oxygen levels.

Immediate action is required if any of these signs appear. Test water parameters and perform partial water changes or aeration adjustments to restore a healthy environment.

Tip: Regular water testing is better than reacting to problems. Consider using a simple water test kit daily to track oxygen, pH, and ammonia. Healthy water equals healthy fish, which equals better growth and higher survival rates.

6

Grading (Size Sorting) – CRITICAL

Fish grow at different rates. If you leave larger fish with smaller ones, they may eat the smaller fish or dominate access to food, causing stunted growth. Regular grading ensures a uniform population, healthier fish, and better overall yield.

Recommended Grading Times

  • Week 2 – first assessment after initial growth
  • Week 4 – follow-up to catch faster growers
  • Every 3–4 weeks thereafter – maintain uniform size groups

Why Grading is Critical

  • Prevents cannibalism among fingerlings and juveniles.
  • Reduces competition for feed, allowing each fish to grow optimally.
  • Improves uniformity, making harvesting and sales easier.
  • Minimizes stress caused by dominance hierarchies.

Practical Tips for Grading

  • Use a gentle net or grading tray — handle fish with care to avoid stress or injury.
  • Sort into at least 3 size groups for better growth management.
  • Grade in the morning or late afternoon when water temperature is cooler.
  • After grading, observe fish closely for 24 hours to ensure no signs of stress or disease.
7

Disease Prevention & Biosecurity

Healthy fish are the foundation of a successful pond. Most losses are caused not by feed or growth, but by preventable diseases. Following proper biosecurity measures reduces the risk of infections, keeps your stock thriving, and ensures consistent yields.

Daily Routine for Healthy Ponds

  • Disinfect nets, buckets, and tools before and after use.
  • Never mix fish from different sources to prevent disease spread.
  • Quarantine new stock for 5–7 days before introducing to main pond.
  • Cover ponds at night to protect from birds, frogs, and other predators.
  • Avoid overfeeding to prevent water pollution and bacterial growth.
  • Check fish behavior daily — lethargy or abnormal swimming is an early warning.

Common Diseases & Signs

Disease Signs & Symptoms
Ammonia Poisoning Red gills, gasping at surface, lethargy
Aeromonas Infection Wounds, fin rot, ulcers, slow growth
Fungal Infection Cotton-like growth on skin or gills
Parasites Rubbing against surfaces, thin fish, erratic swimming

Extra Tips for Disease Prevention

  • Use clean water sources and test regularly for contaminants.
  • Maintain proper stocking density to reduce stress and disease susceptibility.
  • Keep a log of pond treatments, feedings, and fish health checks.
  • Consult a fish health expert immediately if unexplained deaths occur.
8

Harvesting Guidelines

Harvesting is the final and crucial stage of your fish farming cycle. Done correctly, it maximizes quality, minimizes stress, and ensures your fish taste fresh. Rushing this stage or ignoring key steps can result in losses or poor-quality fish.

When to Harvest

  • Harvest at 4–6 months depending on feed quality, stocking density, and growth rate.
  • Check fish size and uniformity — harvest when most fish have reached marketable weight.
  • Stop feeding 24 hours prior to harvest to improve water quality and avoid muddy taste in flesh.
  • Harvest in the early morning or late evening when water temperature is cooler to reduce stress.

Extra Tips for a Smooth Harvest

  • Use gentle nets and avoid overcrowding during capture to reduce injury.
  • Sort harvested fish by size if needed for market preferences.
  • Immediately transfer fish to clean containers with well-oxygenated water if not sold immediately.
  • Record harvest data (weight, size, number) for better management in the next cycle.
  • Clean and disinfect ponds after harvest to prepare for the next batch.
9

DO’s and DON’Ts (Print & Pin This!)

Keeping your fingerlings healthy requires attention to detail. Following the right habits while avoiding harmful practices can make the difference between a thriving pond and costly losses.

DO’s (Always Do)

  • Maintain clean water daily and remove uneaten feed promptly.
  • Use only floating pellets to monitor feeding and reduce waste.
  • Grade fish regularly to prevent cannibalism and ensure uniform growth.
  • Provide aeration consistently — oxygen is critical for survival.
  • Observe fish behavior daily for signs of stress, disease, or abnormal swimming.
  • Keep detailed farm records: feed, growth, water parameters, and mortality.

DON’Ts (Never Do)

  • Do NOT overfeed — uneaten feed pollutes water and reduces oxygen.
  • Do NOT dump feed in one spot — spread it evenly for all fish to access.
  • Do NOT mix fingerlings from different farms — prevents disease transmission.
  • Do NOT change 100% of water suddenly — acclimatize gradually.
  • Do NOT use untreated tap water — chlorine or contaminants can be fatal.
  • Do NOT skip acclimatization — sudden water changes shock fish.
  • Do NOT allow predators — birds, frogs, and snakes can decimate stock quickly.
10

Biggest Mistakes Ghanaian Farmers Make (Avoid These!)

1

Overstocking

2

Not Grading

3

Poor Fingerlings

4

Skipping Water Changes

5

Cheap Feeds

6

Irregular Feeding

7

Ignoring Stress

8

Untreated Water

9

No Pond Cover

10

Poor Records

Ready to Start Your Profitable Farm?

Get premium fingerlings + lifetime expert support